Looking for the ultimate hike in Zion National Park? Look no further than the iconic Angel’s Landing Trail, a challenging yet equally fulfilling adventure.
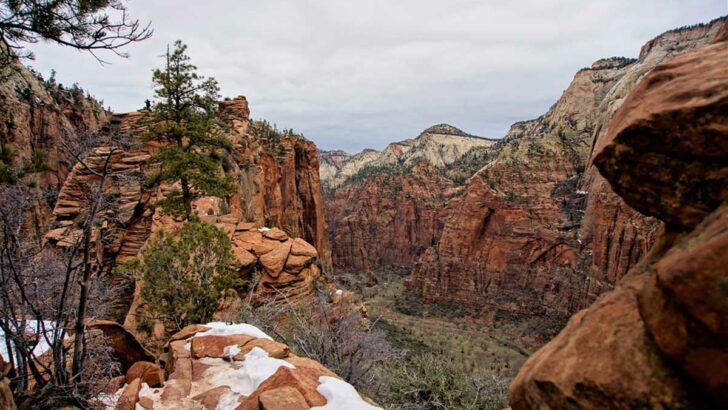
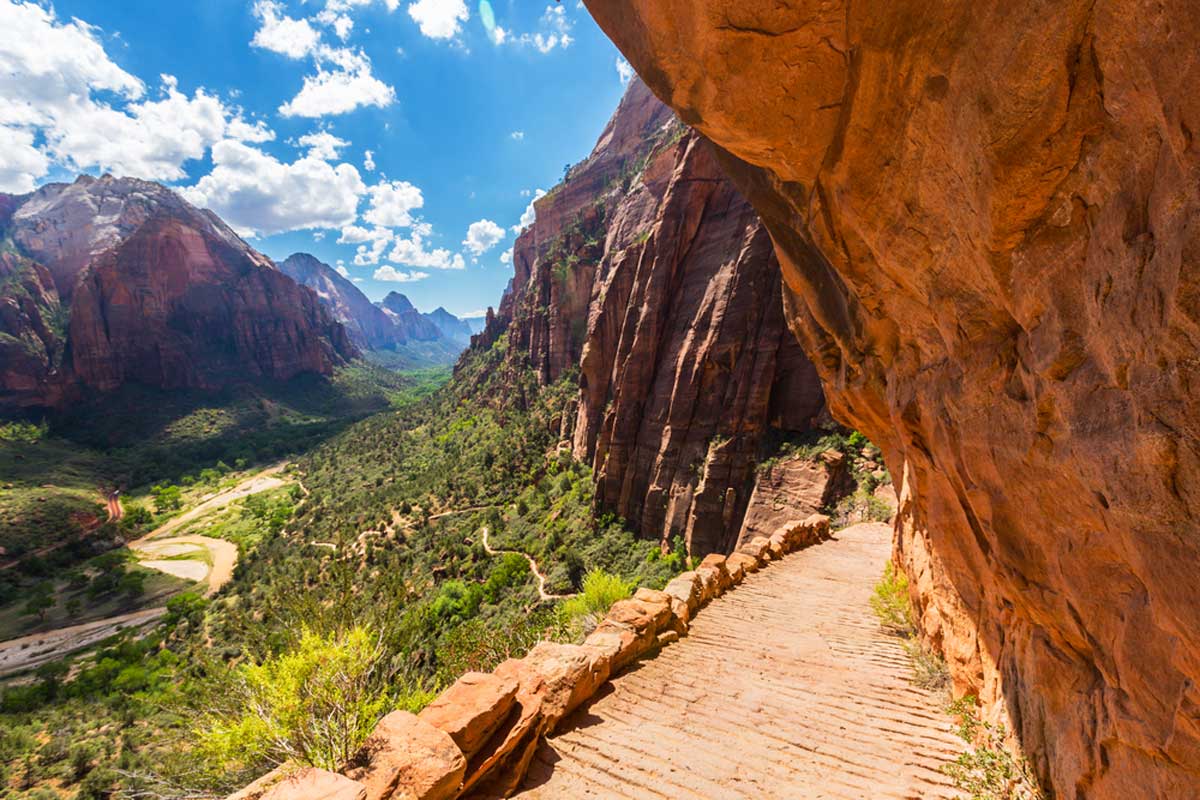
As you walk along the path cut into the rockface, the iconic Angel’s Landing monolith dominates the sky. This is a mythical region in the park where Frederick Vining Fisher famously said only an angel could land.
We’re not quite sure that’s true (soz Fred) as, over the years, this iconic landmark has grown in popularity. And it’s not hard to see why. It’s fair to say that Angel’s Landing is one of Zion National Park’s best hikes.
This guide will take you through all the essential details about Zion National Park’s Angel’s Landing. From how to book your tickets to the safety precautions you should take when climbing.
So pull on those hiking boots and get ready to explore…
Why Hike Angel’s Landing? What’s So Special About the Trail?
Angel’s Landing in Zion National Park is one of the best trails in the world, let alone in the park. A bold statement, we know – but one we firmly stand behind.
Starting at the Grotto Trailhead, the hike has an impressive elevation gain of 1500 feet to the summit.
There are adrenaline-pumping areas along the exposed rock, gentle forest walks, and unforgettable scenery throughout the hike. Due to its popularity, the park has set up a lottery system where you have to apply for a permit to hike this trail (more on that later).
It’s also a fairly dangerous hike and not for the fainthearted. Many areas require climbing near steep slopes, so this hike isn’t for you if you’re unfit or afraid of heights. Still, that doesn’t take away from the life-altering journey you experience here.
As challenging as it is, you’ll feel on top of the world once you make it past the intense final climb. And if you can’t make it to the summit, Scout Lookout offers just as breathtaking a view.
Hiking The Angel’s Landing Trail: In Detail
Angel’s Landing Trailhead
Let’s get started: Zion National Park’s Angel’s Landing trailhead is a 5-mile drive (15 minutes) from the park’s visitor center. Several signs along the road indicate where the trailhead is, and the parking area is large, so we doubt you’ll miss it.
Top Tip: Make sure you have a permit to hike this trail – grab yours here. There are usually park rangers at the Grotto who check your ticket before you start the trek.
Angel’s Landing Hike: Step by Step
Angel’s Landing Trailhead
Take our advice: Before heading out, ensure you fill your water bottle and use the restrooms. This is a long hike, so the last thing you want is to need the toilet mid-hike.
You’ll start this great expedition at the Grotto Trailhead. From the parking lot, you’ll cross the hiker’s bridge over the rushing waters of the Virgin River.
Take a right turn onto the West Rim Trail and trek this path for two miles. As soon as you start the walk along the west Rim Trail, the fin-like shape of Angel’s Landing comes into view.
The West Rim Trail
This part of the hike is a gradual incline with an elevation gain of 850 feet. And, depending on the time of day, this can be an energy-sapping section with little shade.
The West Rim Trail does meander alongside the Virgin River, though, so you’ll hear the roaring sound of water and get the occasional (much welcomed) gust of cool air.
After slugging it along this wide and well-worn path, you’ll get to Refrigerator Canyon, roughly 1-8 miles from the start. This is the only part of the hike where you’ll find proper shade, so we recommend catching your breath here and taking a sip of water.
Walter’s Wiggles
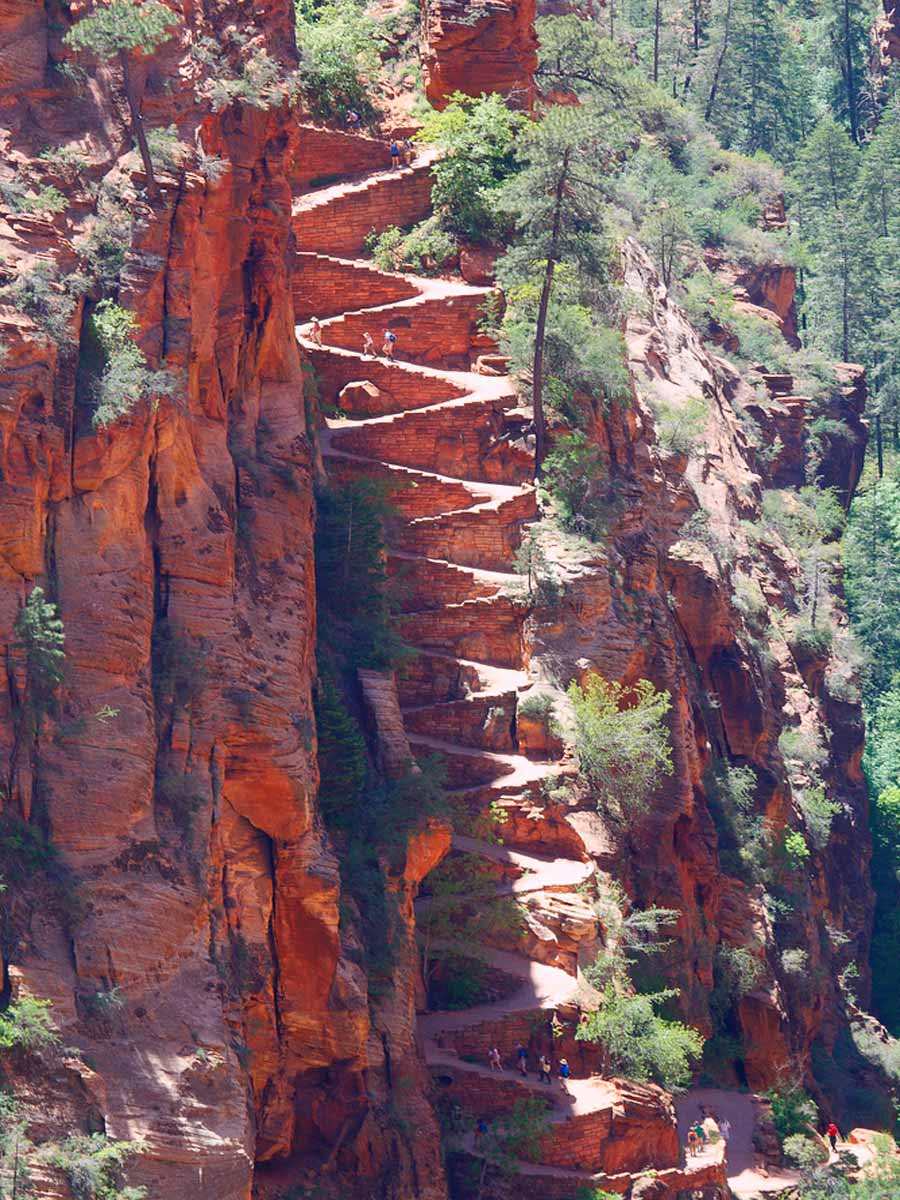
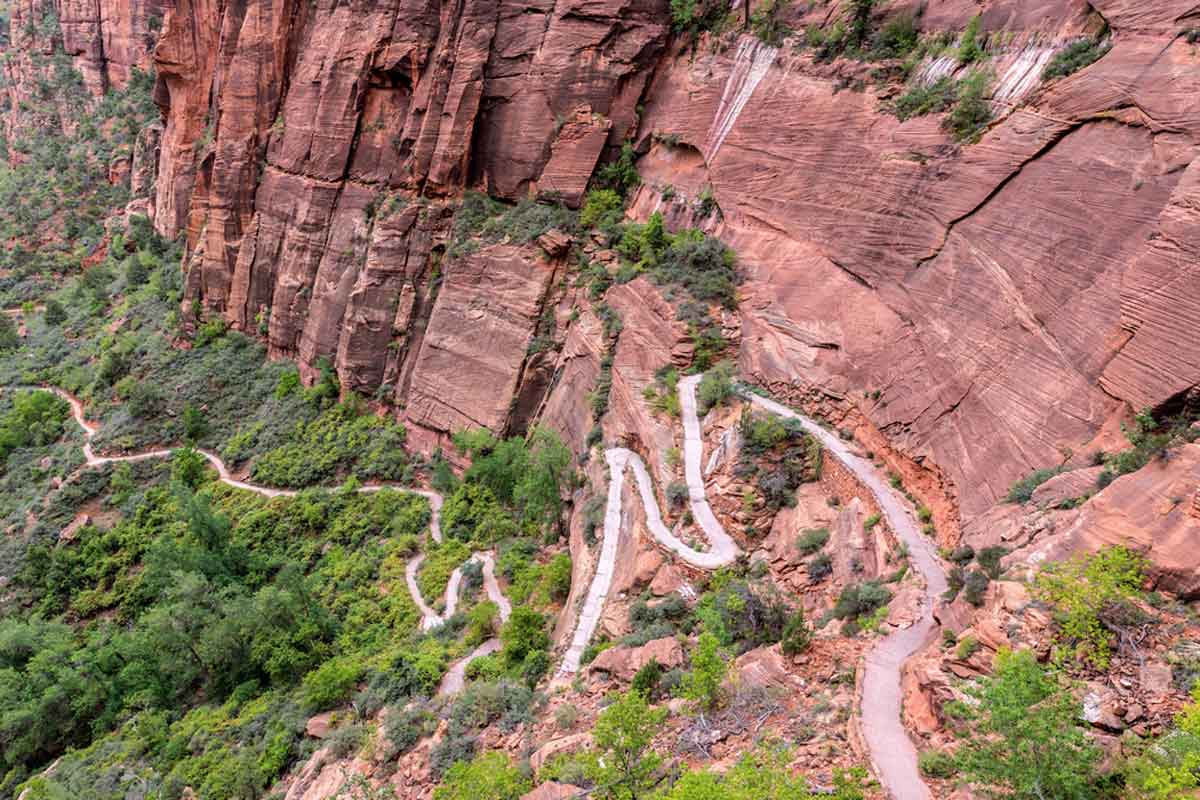
Once you feel ready to tackle the next part of this adventure, it’s onto Walter’s Wiggles. Although the name may make you giggle, this is a grueling hike up the 21 switchbacks.
This is a zigzagging path that has a ridiculous 250 feet elevation gain. So trust us when we say your thighs will burn after the first few flights. Once you make it to the last switchback, you’ll reach Scout Lookout, a stunning spot to admire the breathtaking Zion landscape.
Scout Lookout to the Summit
Take a sigh of relief. You’re now into the final stretch of this hike, with Scout Lookout just 500 feet from the summit of Angel’s Landing.
However, this is the most challenging section, with a daunting elevation gain of 400 feet.
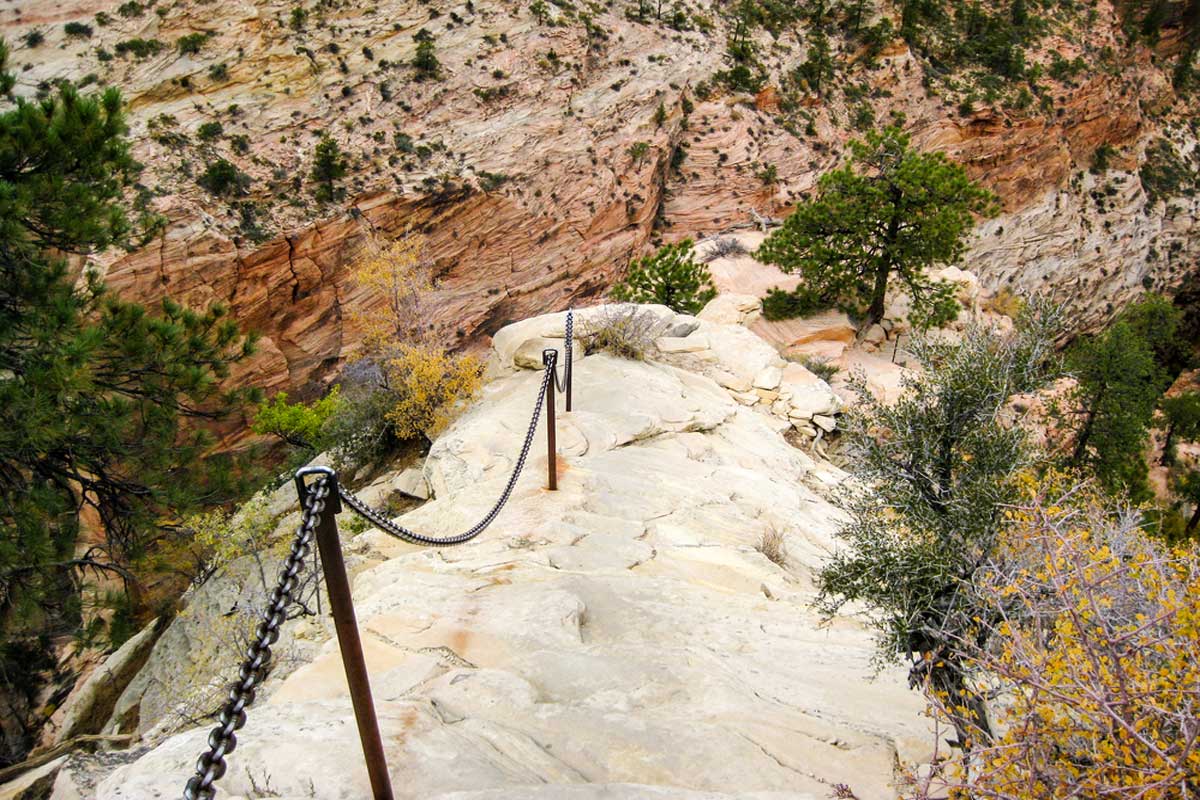
The first part of this climb is relatively manageable, with chain rails helping you along the way. We recommend using these chains wherever possible to ensure a safe hike.
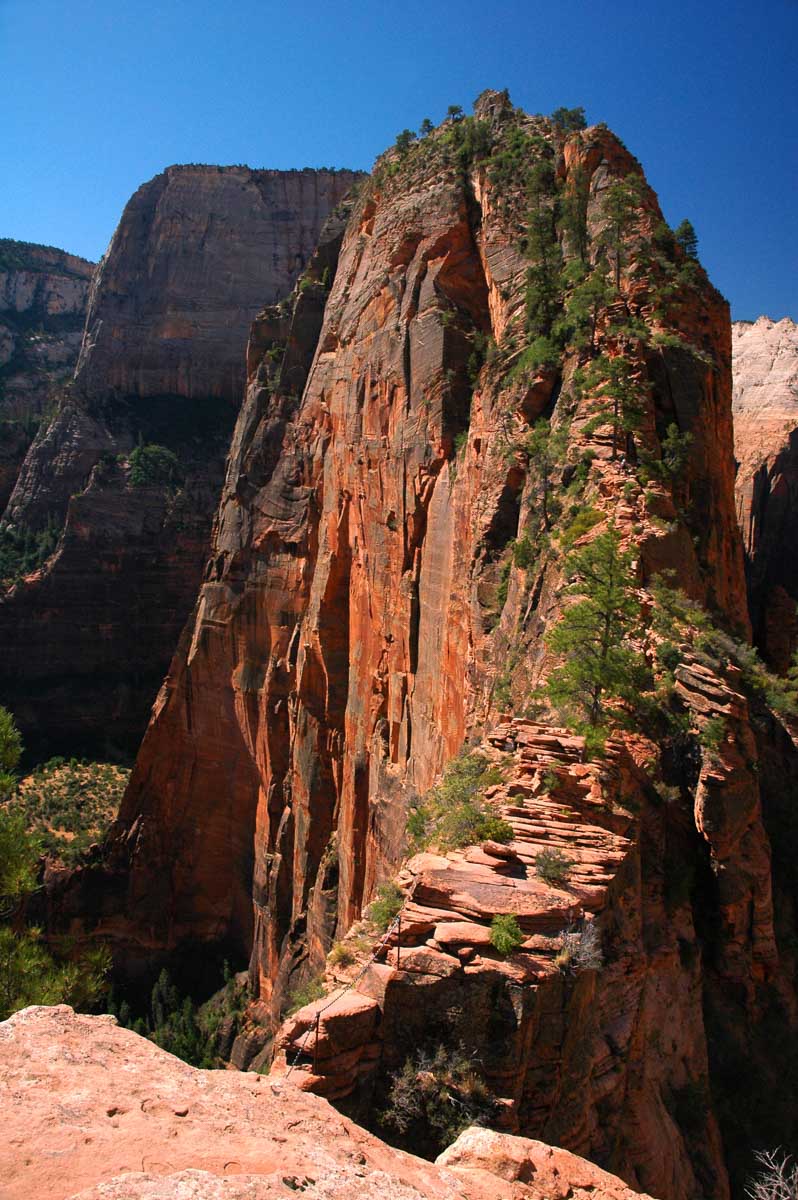
The middle section of the spine is the most dangerous, with a narrow and steep climb up the side of the cliff. You’ll need to use the chains here and take it slow and steady. The sandstone steps and boulders that form this part of the trail are secure, but always ensure you have sound footing.
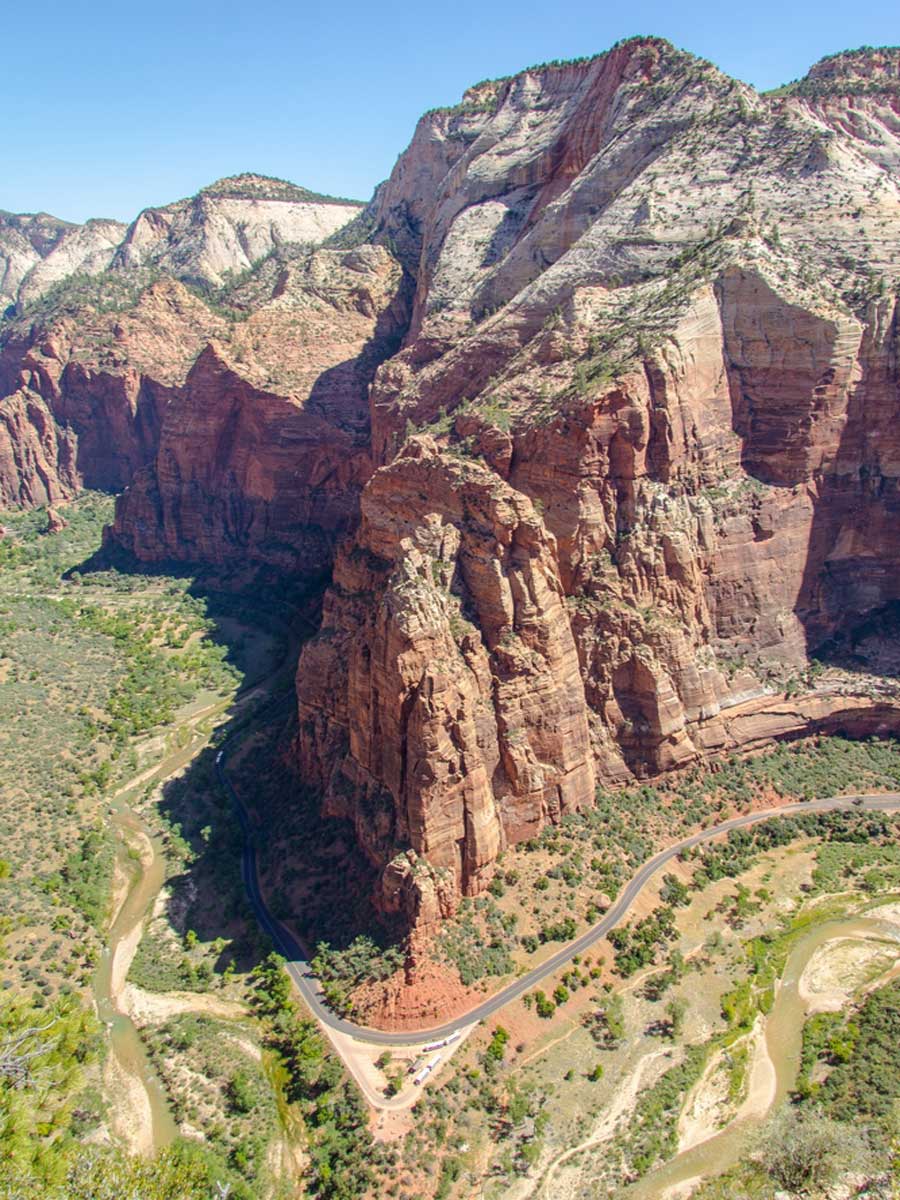
The trail is so narrow here that you’ll need to go one by one, so you’ll need to take turns if people are hiking the other way. And if you look to your left, you’ll see the Virgin River below and the West Rim Trail to your right.
You’ll reach a large pine tree in the middle of the path, where you can catch your breath. And then there’s just one final push to the summit. You can do it!
Angel’s Landing Summit
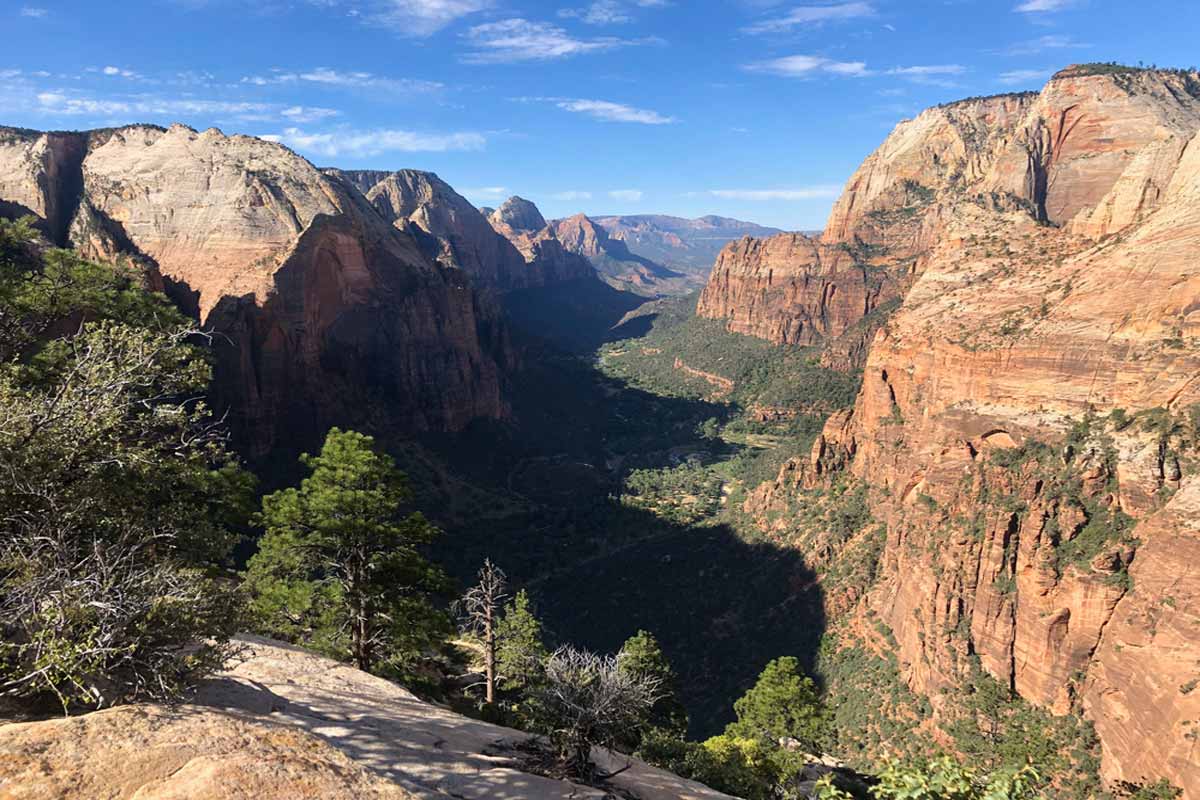
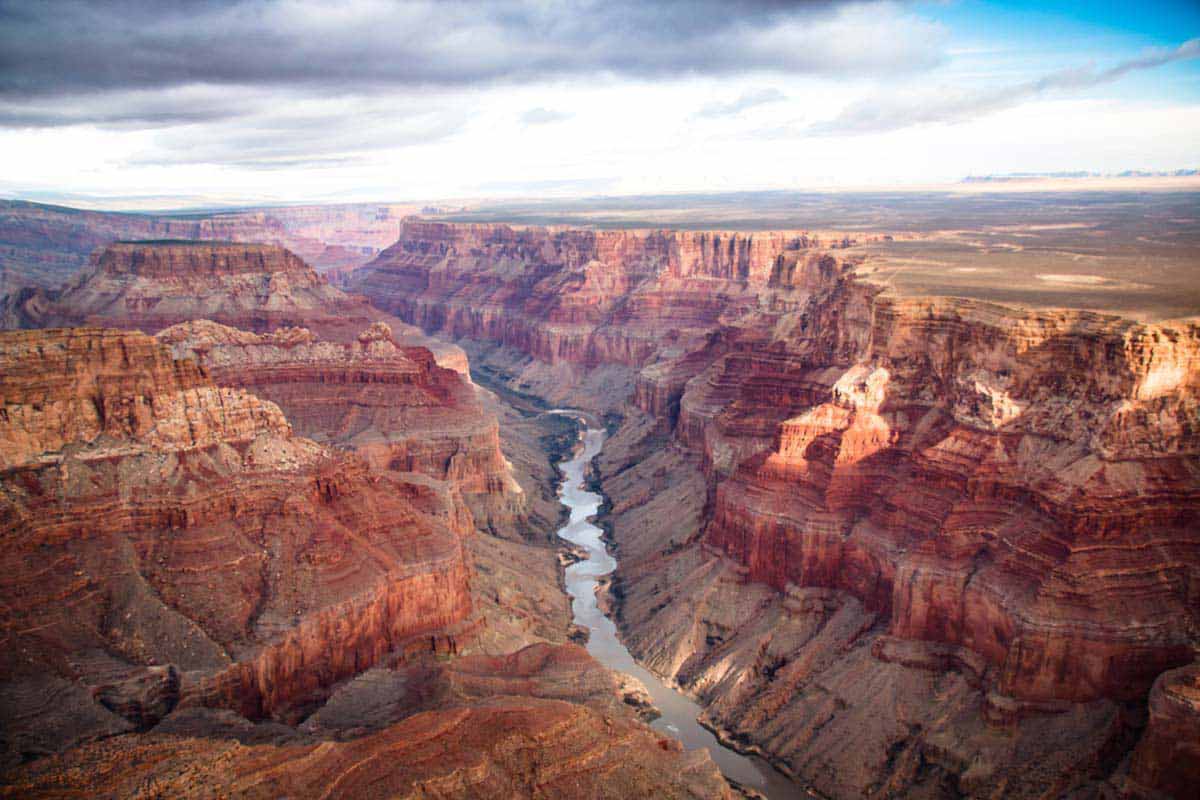
After the last few feet of narrow trekking along chain rails, you’ll reach the ultimate view of Zion National Park. You’ll have sweeping views of Mount Majestic to the West, Refrigerator Canyon to the south, the Virgin River to the east, and the valley to the north.
It is an extraordinary sight begging you to whip out the camera. You get similar views on Zion Canyon Road, but nothing compares to the feeling of conquering this impressive climb.
Once you’ve had a chance to catch your breath, drink some water, and admire the views, head back down and marvel in all your glory.
Practical Tips for Hiking Angel’s Landing, Zion National Park
How to Get Your Zion National Park Angel’s Landing Permit

For the safety of hikers and maintaining the trail, you’ll need to get a hiking permit before embarking. We’ll level with you – there is quite a process you need to go through to obtain a permit.
The park has a lottery system, where you must apply for the hike, and only a select number of applicants get permits.
A seasonal lottery allows you to apply for seven potential hiking days. These seasonal lotteries are open month-by-month, so if you intend to hike in April, you’ll apply between January 3rd and January 20th.
It costs $6 to apply during the season lottery and covers up to six people. You will find out if you got a permit or not via email, which you will receive on the 25th of the month you apply.
If you don’t receive a permit during the season lottery, you can also try to get a ticket with the day-before lottery. As the name suggests, you will apply the day before you intend to walk between 12:01 am and 3 pm. Applications will also cost $6 and cover up to 6 hikers.
You’ll receive an email by 4 pm that day, stating if you’ve won the Zion National Park Angel’s Landing lottery. For the seasonal and day-before lottery, if you receive a permit, you’ll need to pay an additional $3 for each hiker.
You can learn more about Angel’s Landing and the lottery process on the NPS government website.
Leave No Trace
This is a beautiful hike that deserves your full respect. And to make the hiking experience one-of-a-kind for all, there is a leave-no-trace policy. So whatever you take up the mountain must come back down, be it snacks or water bottles.
Hike With Caution
We think this is relatively self-explanatory but be careful when hiking Angel’s Landing. Unfortunately, injuries do occur, and in some cases, people have died.
When hiking, be considerate of others – especially between Scout Lookout and the summit.
And lastly, know your limits. There’s no shame in turning back at Scout Lookout if you know you won’t be able to make it to the top.
Leave Early in the Day
It gets scorching out here, and the trail still gets busy despite the permit system. If you hike earlier in the morning, you’ll miss most of the midday heat and a lot of the crowds.
Use the Chain Rails and Take Regular Rests
The chains are there for a reason, so use them. It’s also vital that you take regular rests.
We recommend resting when you reach Refrigerator Canyon, the base of Walter’s Wiggles, and at Scout Lookout.
Get a Good Pair of Hiking Boots
As this is a strenuous hike, you should have good-quality hiking boots. You’ll want them to be comfortable and have good traction as well.
Angel’s Landing Hike Zion National Park: FAQs
How Long is The Angel’s Landing Hike?
This is a 4.4-mile out-and-back hike that will take roughly three and a half hours to complete.
How Hard is the Angel’s Landing Trail?
This is a very strenuous trail with an elevation gain of 1500 feet, so we suggest hiking it with plenty of caution. Despite all the amazing things said about this route, you must also keep your fitness, hiking ability, and tolerance for heights in mind.
If you know you’ll struggle with this hike, consider testing your skills on the Watchman Trail first.
When is the Best Time for an Angel’s Landing Zion National Park Hike?
The best time to enjoy this hike is between February and October. We recommend hiking in the first or last months of this period as the trail will be less busy.
This is just one thing to keep in mind, so we recommend reading our guide on the things to know before traveling to Zion.